XRPLWin Code IDE 101 - deploying Starter Contract
Posted: Sat Sep 28, 2024 12:33 pm
This is step to step sample on how to get contract running on Evernode host by using XWCode
Watch video: https://www.youtube.com/watch?v=P8oZ_g_e7vk
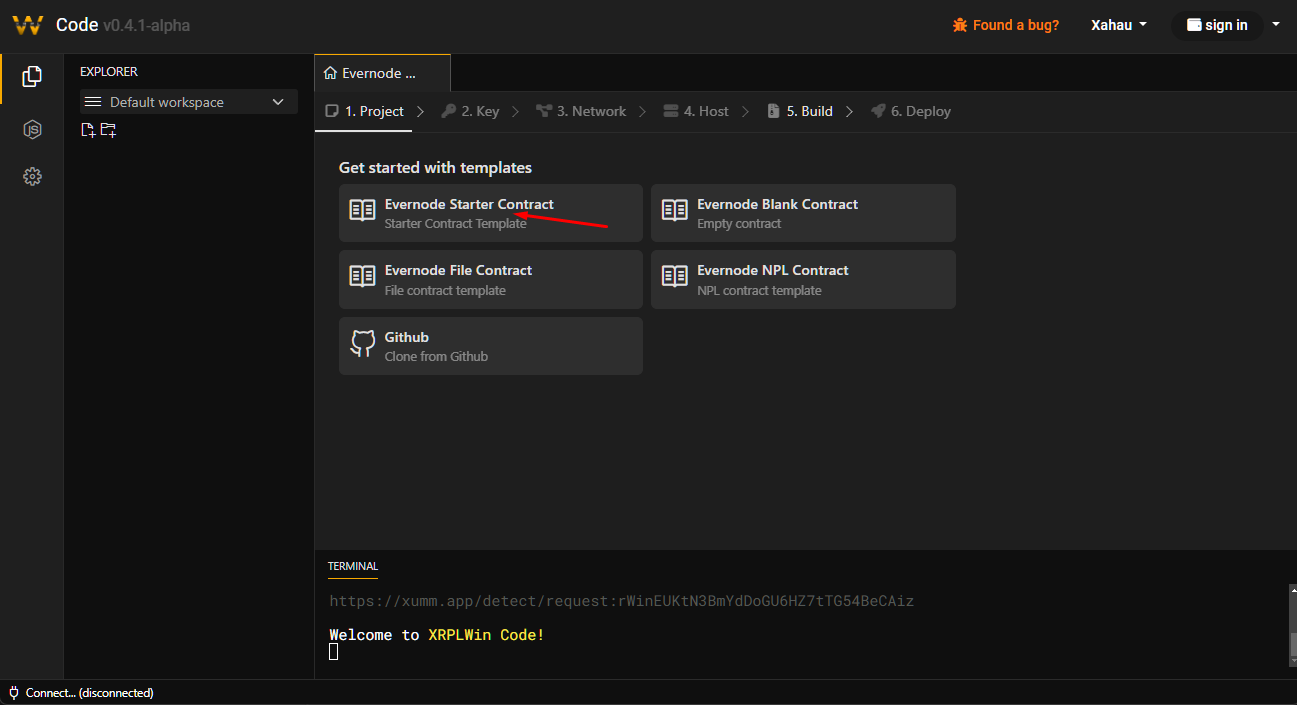
1. Go to https://xahau.xrplwin.com/code/evernode
2. Click starter template
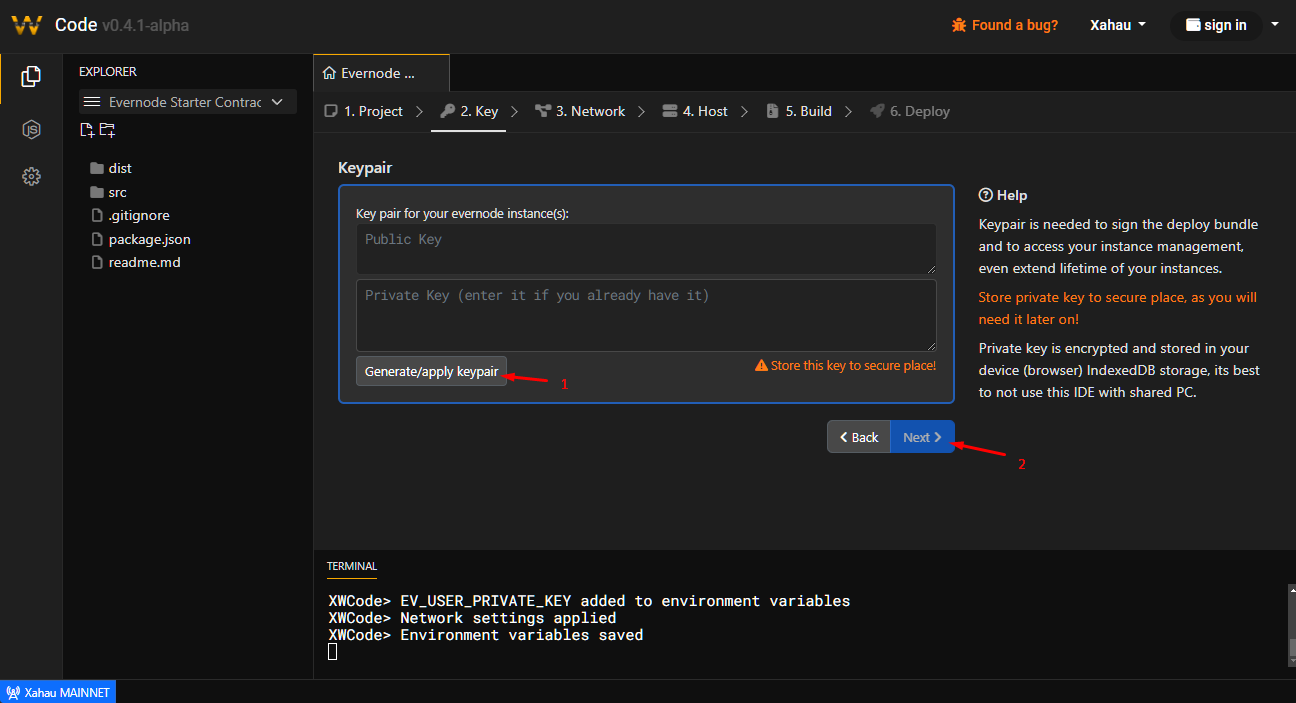
3. In next step you are required to apply or generate new Keypair. This is required step as your generated public key will be in deployment bundle.
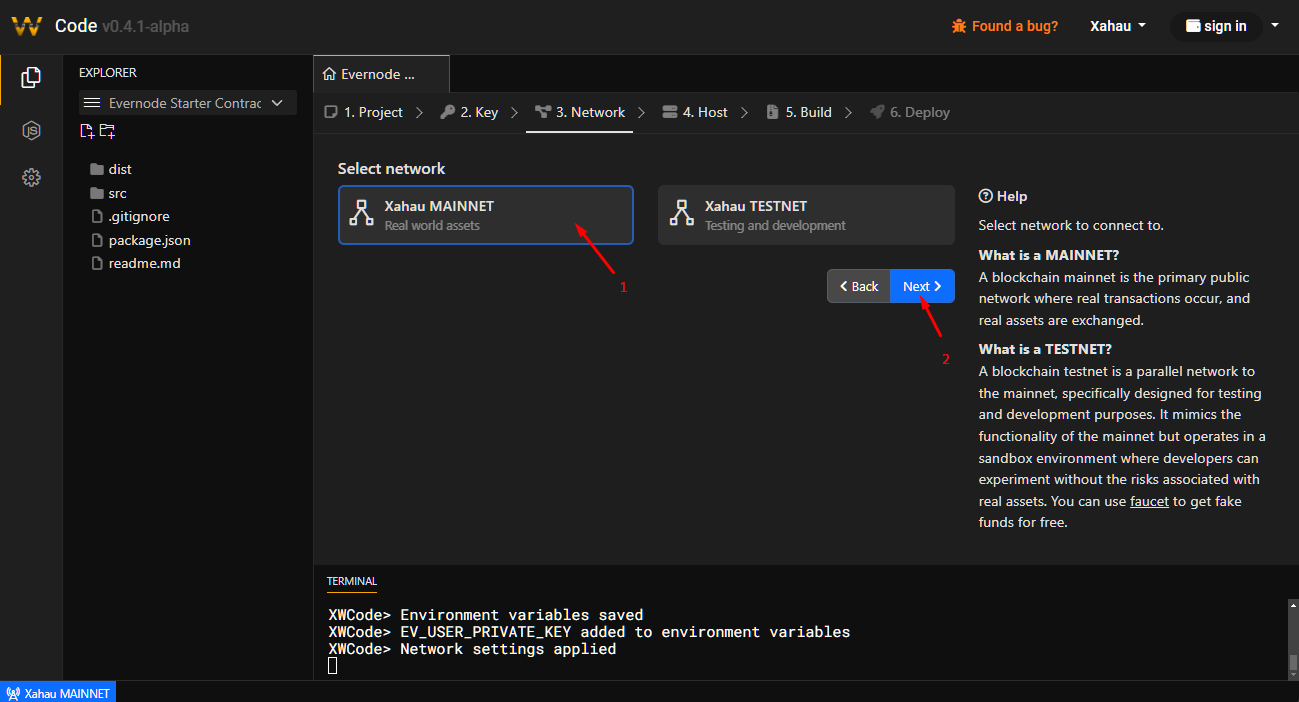
4. Just go straight to Xahau Mainnet - there are plenty of hosts and they are cheap. Click next to pick host.
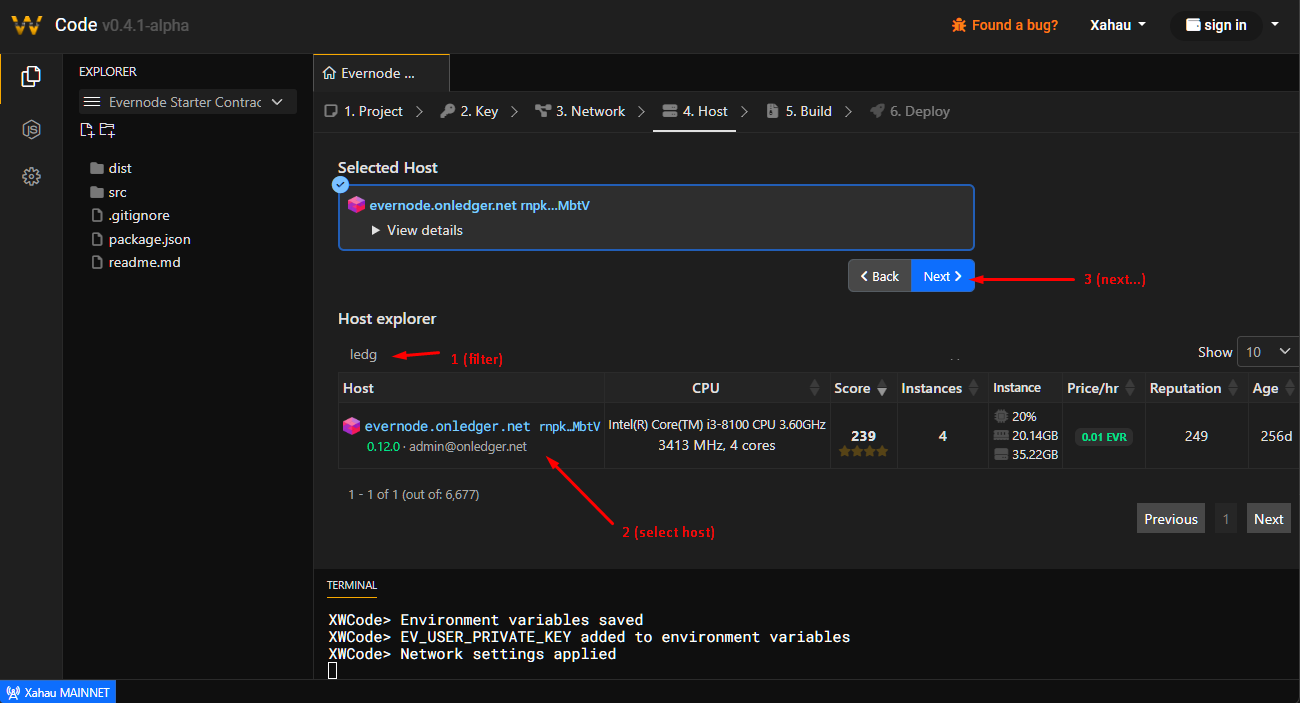
5. Pick host and click Next...
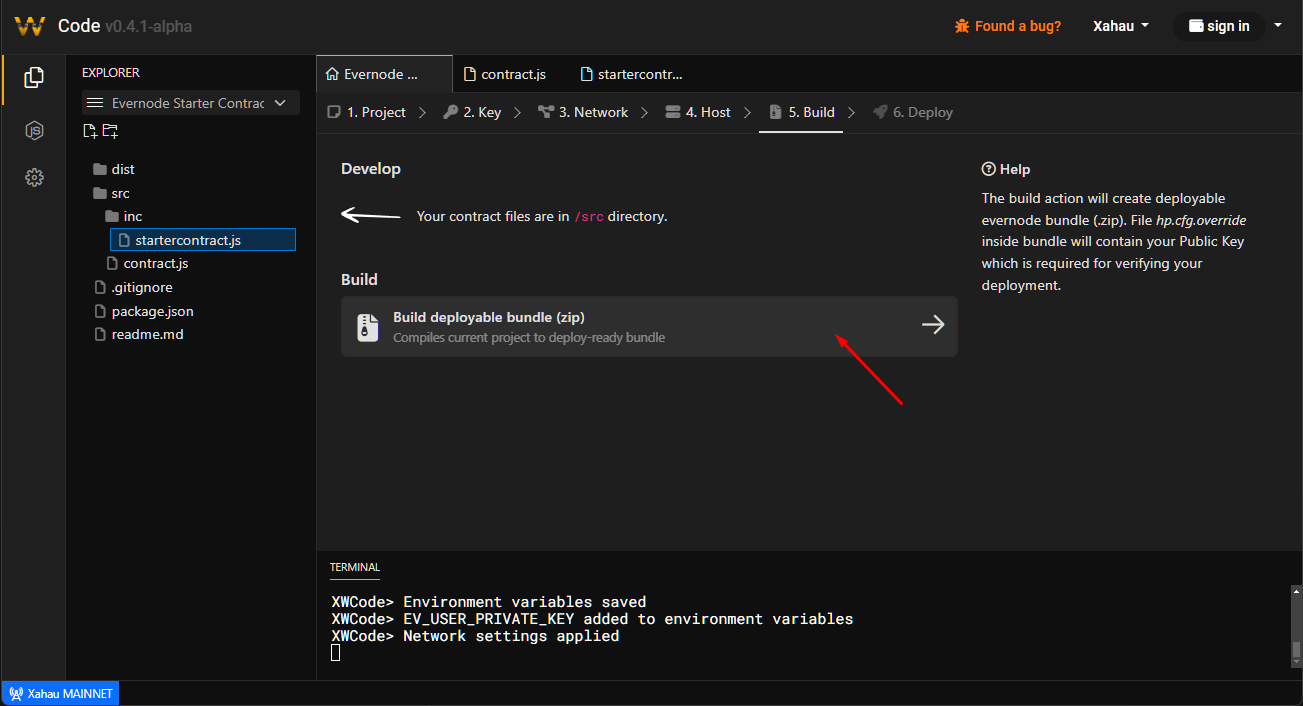
6. Now is good time to review your code.
Starter template have two contract files, one is contract.js which you wont need to modify.
Real logic is in inc/startercontract.js file, there you can see are mapped few methods "get", "set", "stat"... we will try to do "stat" via client later.
Click on "Build deployable bundle" button, and IDE will automatically compile and zip your /src files + take /dist config and scripts and zip them to deployable bundle (zip file).
Remember Keypair? Public key is auto-inserted to /dist/hp.cfg.override ... so final hp.cfg.override (inside zip) will look like:
(unl "ed127b6ae..." will be your public key)
7. Click next
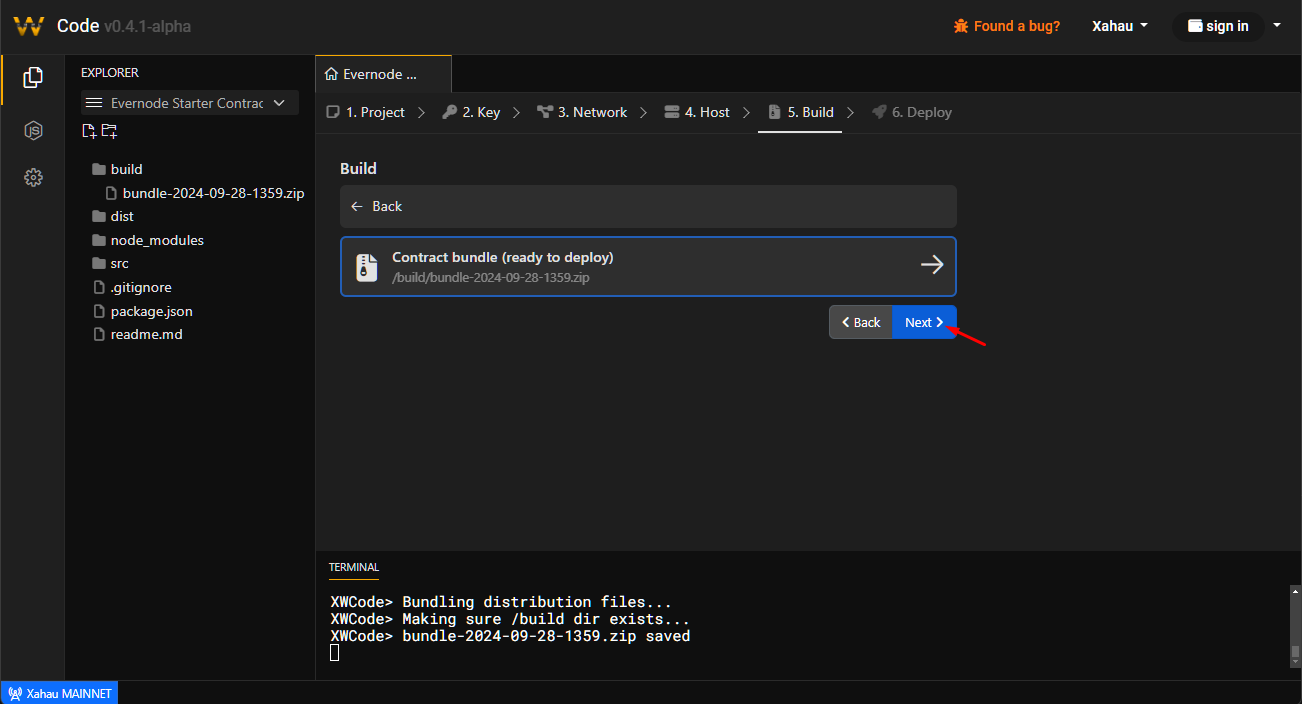
8. This is overview of selected options (host and bundle), click on "Lease & Deploy" to start the deployment process.

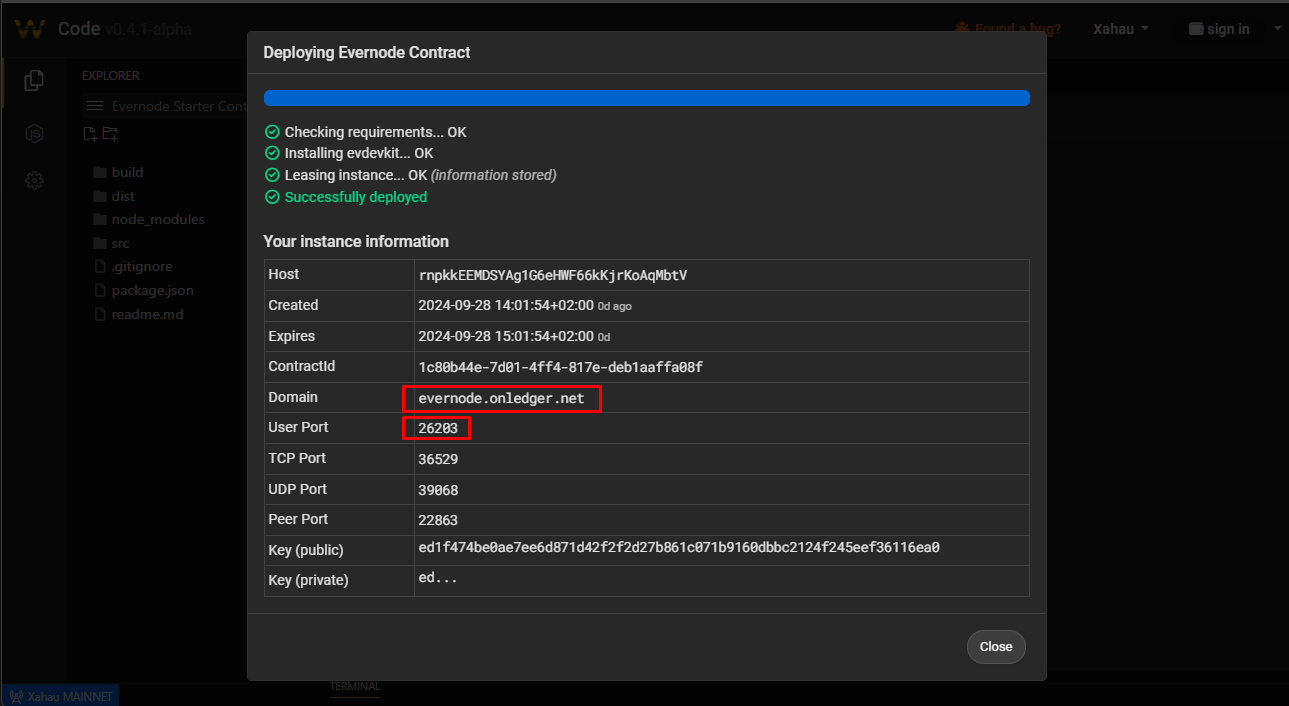
9. After you wait for few minutes IDE did the following
Now we are done with XWCode
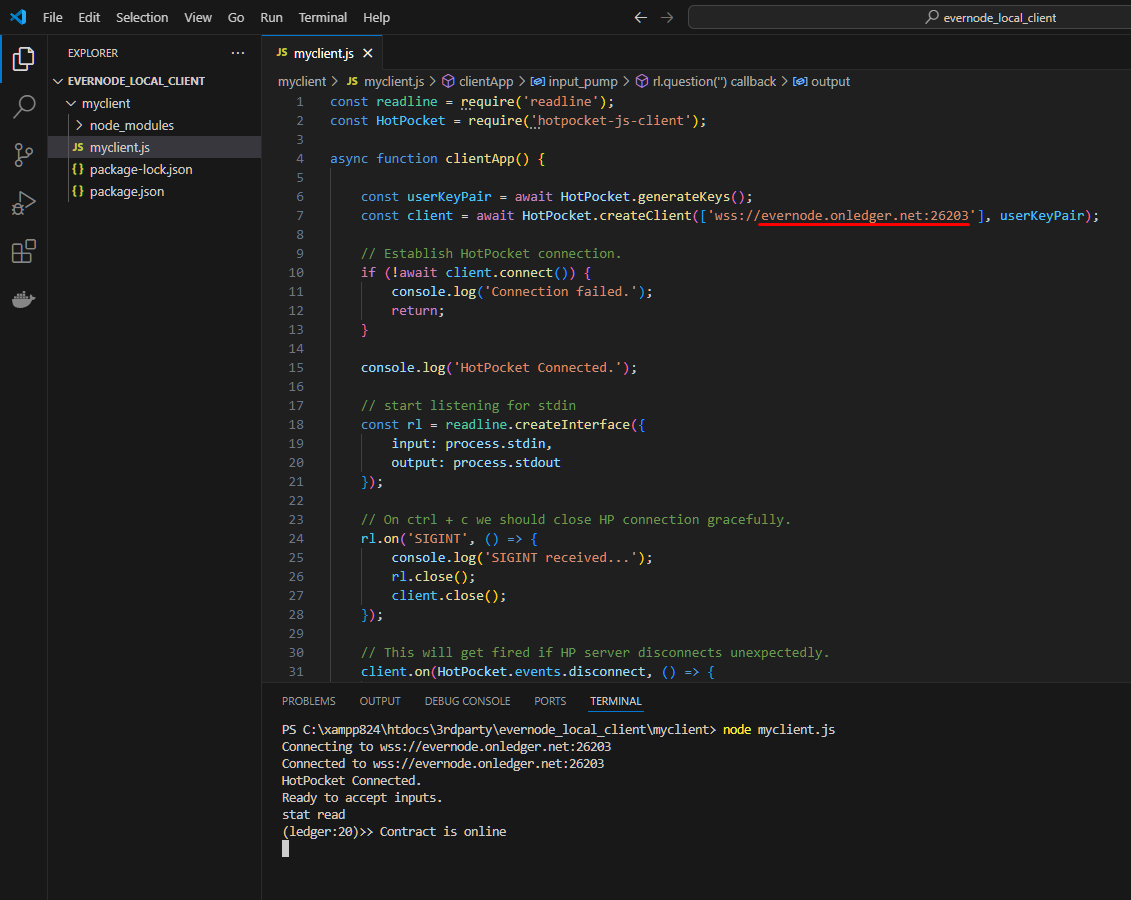
11. Create client application (to test our deployed contract)
Lets use official evernode tutorial for this using VSCode on local PC:
https://docs.evernode.org/en/latest/sdk/hotpocket/tutorials/basics.html#create-the-client-application
After that is done you will end up with this - insert hostname and port you got previously
Use console to run: node myclient.js
then type in "stat read" and you should get output.
Congrats, you successfully communicated with your contract on decentralized Evernode Host!
Watch video: https://www.youtube.com/watch?v=P8oZ_g_e7vk
1. Go to https://xahau.xrplwin.com/code/evernode
2. Click starter template
3. In next step you are required to apply or generate new Keypair. This is required step as your generated public key will be in deployment bundle.
4. Just go straight to Xahau Mainnet - there are plenty of hosts and they are cheap. Click next to pick host.
5. Pick host and click Next...
6. Now is good time to review your code.
Starter template have two contract files, one is contract.js which you wont need to modify.
Real logic is in inc/startercontract.js file, there you can see are mapped few methods "get", "set", "stat"... we will try to do "stat" via client later.
Click on "Build deployable bundle" button, and IDE will automatically compile and zip your /src files + take /dist config and scripts and zip them to deployable bundle (zip file).
Remember Keypair? Public key is auto-inserted to /dist/hp.cfg.override ... so final hp.cfg.override (inside zip) will look like:
(unl "ed127b6ae..." will be your public key)
Code: Select all
{
  "contract": {
    "bin_path": "/usr/bin/node",
    "bin_args": "index.js",
    "unl": [
      "ed127b6aef6c6c2035a0ffd8a6e183603b2dce703f23c538ee4e94c0cbb507b1eb"
    ]
  }
}
7. Click next
8. This is overview of selected options (host and bundle), click on "Lease & Deploy" to start the deployment process.
9. After you wait for few minutes IDE did the following
- Installed evdevkit to local VM (required for uploading bundle)
- Leased instance (using XRPLWin Bridge account)
- Uploaded to instance (using evdevkit locally)
Now we are done with XWCode
11. Create client application (to test our deployed contract)
Lets use official evernode tutorial for this using VSCode on local PC:
https://docs.evernode.org/en/latest/sdk/hotpocket/tutorials/basics.html#create-the-client-application
After that is done you will end up with this - insert hostname and port you got previously
Use console to run: node myclient.js
then type in "stat read" and you should get output.
Congrats, you successfully communicated with your contract on decentralized Evernode Host!